

How To Run Dxdiag On Windows 8
The DirectX Diagnostic Tool (otherwise known as "DxDiag") is a troubleshooting utility for graphical and sound-related problems. Information technology provides detailed system information for DirectX components and drivers. Some software support services might enquire you to provide system info with DirectX Diagnostic Tool'south Save All Information option.
Thus, the DxDiag window is a proficient place to check system and VDU (Visual Display Unit) specifications on your PC for gaming purposes. There's more than i manner you tin open DirectX Diagnostic Tool. These are 8 alternative methods for launching DirectX Diagnostic Tool in Windows 11.
The Run box is Windows 11's default accessory for opening programs. You can launch most built-in Windows tools past entering commands for them in the Run dialog. This is how to open up DirectX Diagnostic Tool with that accessory.
- Press the Win + 10 keys at the same time.
- Select the Run shortcut on the Power User menu.
- Input dxdiag in the Open up box.
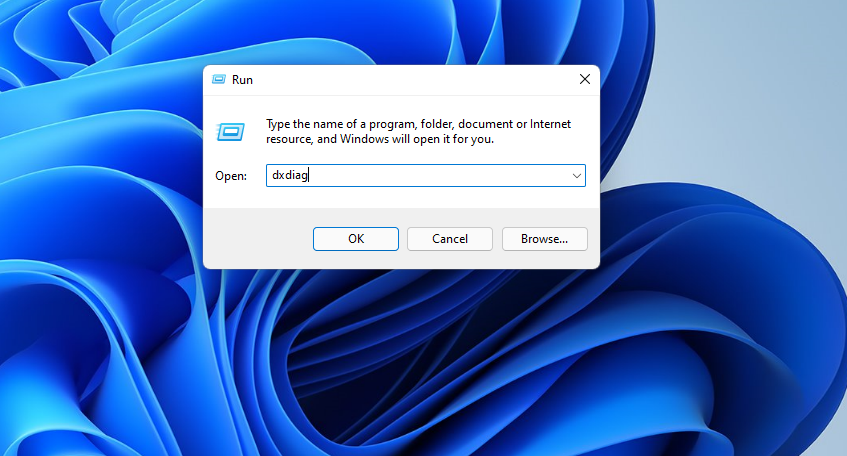
- Press Run's OK button to open up the window straight beneath.
Some users prefer to use Windows 11's search tool for opening software, files, and folders. You can enter keywords in that search utility to find then open whatever yous're looking for. You'll need to search for the DirectX Diagnostic Tool every bit follows.
- Printing the Win + S hotkey for opening the "Type here to search" box.
- Enter the keyword DxDiag to find DirectX Diagnostic Tool.
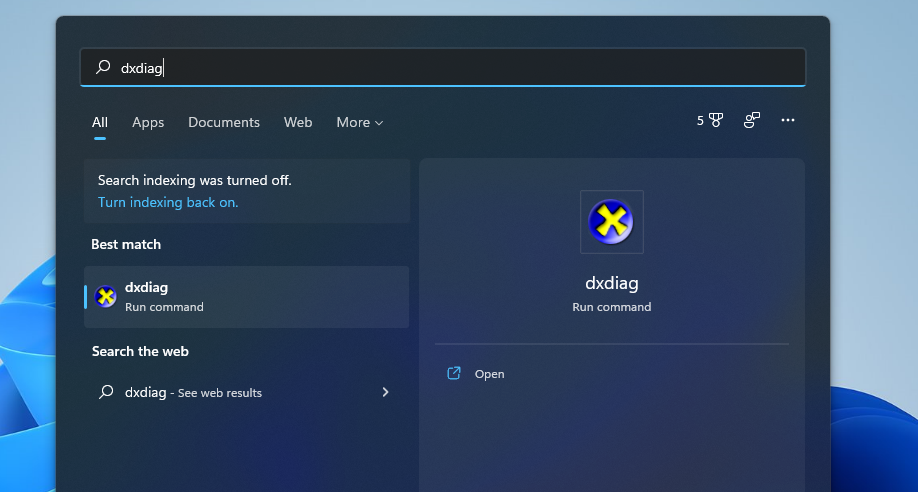
- So click the DxDiag search result to open up the utility.
Users who often apply PowerShell or the Command Prompt might adopt to open DirectX Diagnostic Tool with those control-line interpreters. You can launch DxDiag with both inside the Windows Concluding panel. These are the steps for opening DirectX Diagnostic Tool via Windows Terminal.
- Click the taskbar's First button with your right mouse push to select Windows Last.
- And then click the Open a new tab button at the acme of Windows Terminal to open the carte du jour shown directly below.
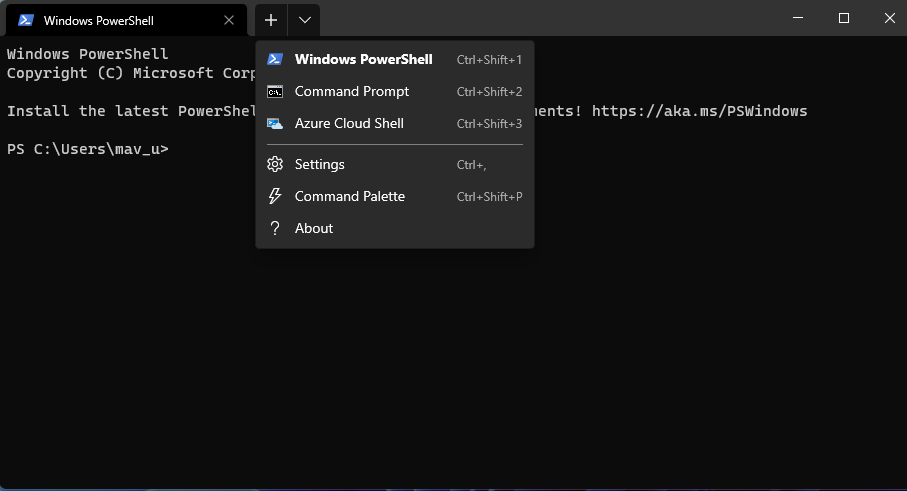
- Select Command Prompt or Windows PowerShell on that menu.
- Input dxdiag in Windows PowerShell or the Command Prompt.
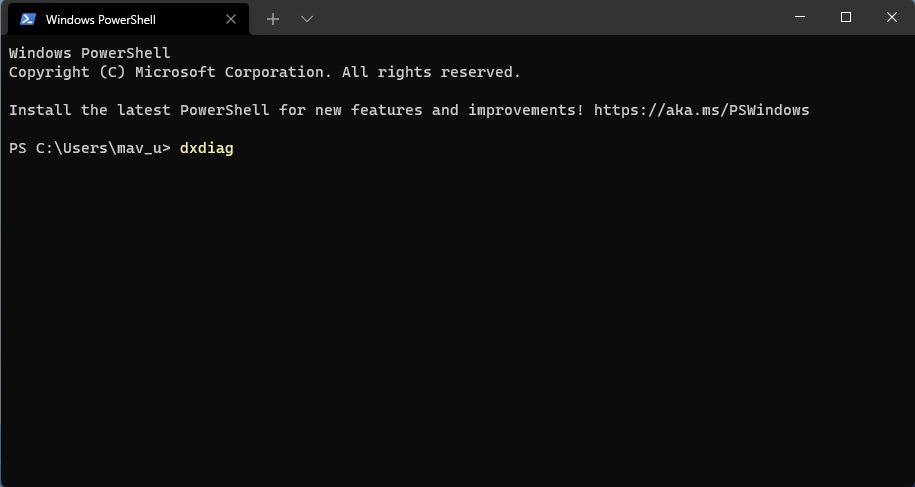
- Press the Enter key to bring upward DirectX Diagnostic Tool.
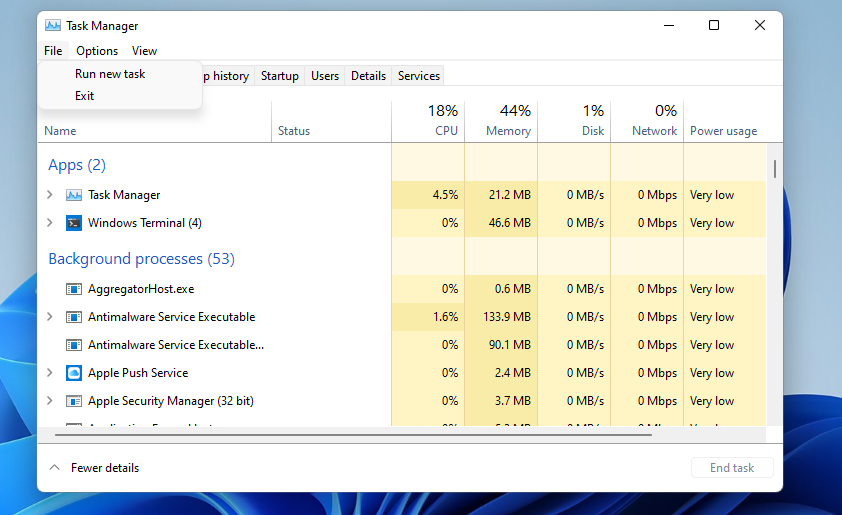
Task Manager incorporates a Create new task feature that's very similar to Run. Then, you tin launch DirectX Diagnostic Tool with that characteristic. This is how to open up DxDiag from Task Manager.
- Printing the Ctrl + Alt + Delete key combination, and select the Task Managing director option.
- Click Task Director's File carte.
- Select Run new task to bring upward the Create new task window.
- Type DxDiag in the Create new task window's text box.
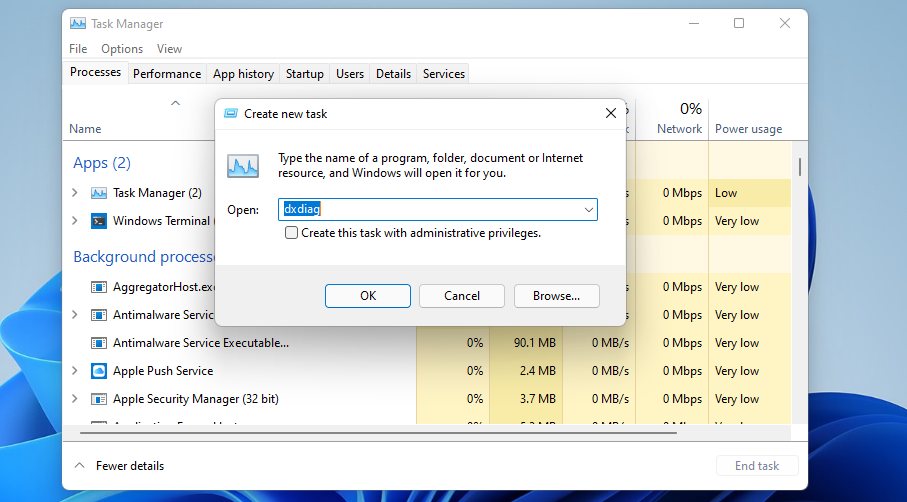
- Click OK to launch DxDiag.
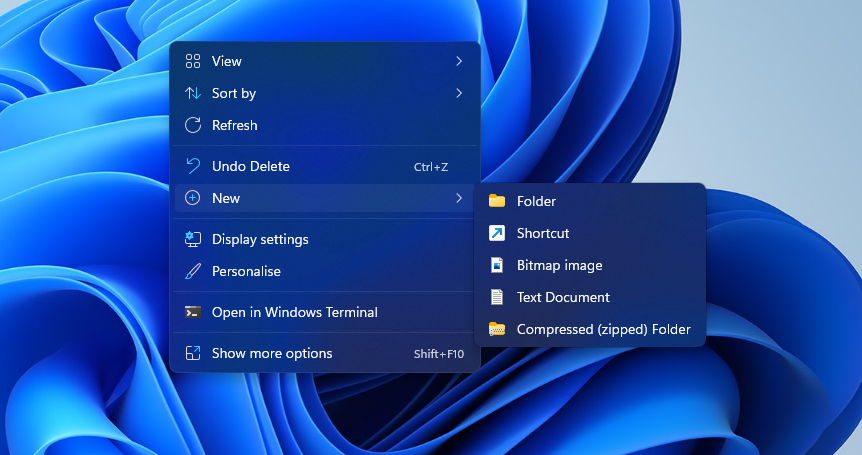
Setting up shortcuts for DxDiag volition give you a more direct way to open up it. Y'all tin add a DirectX Diagnostic Tool shortcut to the desktop to open the utility from at that place. To practise so, follow these steps for setting upward a DxDiag shortcut.
- Right-click an expanse of Windows 11'south desktop to select the New option.
- So select Shortcut on the submenu.
- Type dxdiag in the location of particular box.
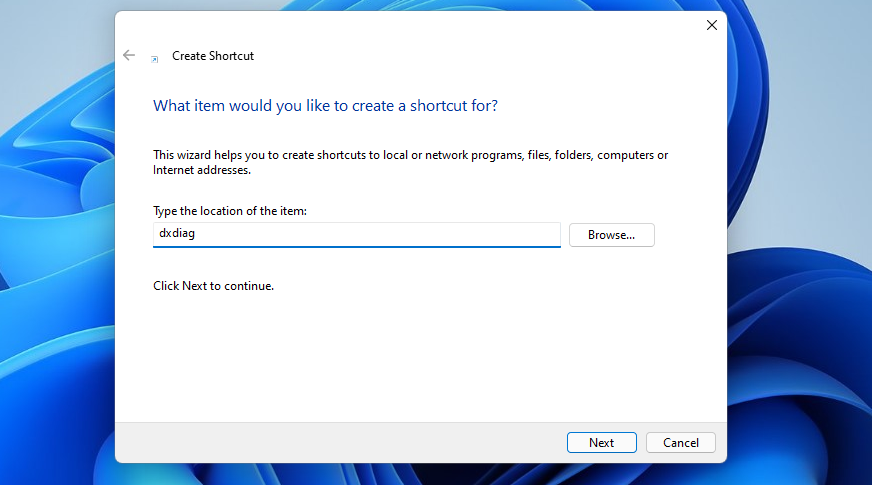
- Click Side by side on the Create Shortcut window.
- Input DirectX Diagnostic Tool in the proper noun text box.
- Printing the End button to add together the shortcut.
- Now y'all can click the DirectX Diagnostic Tool desktop shortcut to open up that utility anytime.
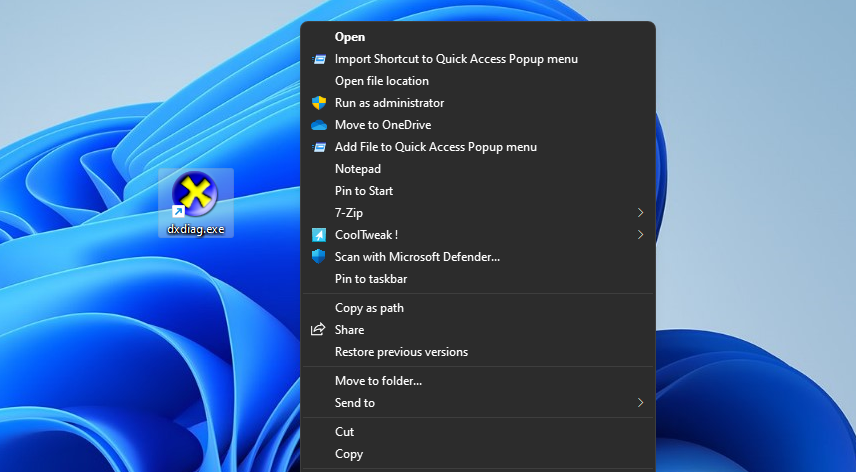
If you adopt taskbar shortcuts, you can pivot DxDiag there. To do so, yous'll need to prepare a DirectX Diagnostic Tool desktop shortcut as outlined in the preceding method. Right-click that shortcut's desktop icon and select Evidence more options. Select the Pin to taskbar option on the classic context carte du jour. And so you tin can click the DxDiag icon on the taskbar to open it from there.
You tin can also add a DxDiag shortcut to the Outset menu much the same. Select the Pivot to taskbar pick on the desktop shortcut'southward context menu. Then click DirectX Diagnostic Tool in the pinned section of the Start menu to open it.
A keyboard shortcut will enable you lot to open up DirectX Diagnostic Tool without the mouse. You lot can prepare up a DxDiag hotkey based on a desktop shortcut for that utility. This is how you can set up a hotkey for opening DxDiag.
- Add a DirectX Diagnostic Tool shortcut to Windows eleven's desktop as instructed for method five.
- Right-click the DirectX Diagnostic Tool desktop shortcut to open its context menu and select Backdrop.
- Next, click in the Shortcut primal box to place the cursor there.
- Printing D to constitute a Ctrl + Alt + D keyboard shortcut.
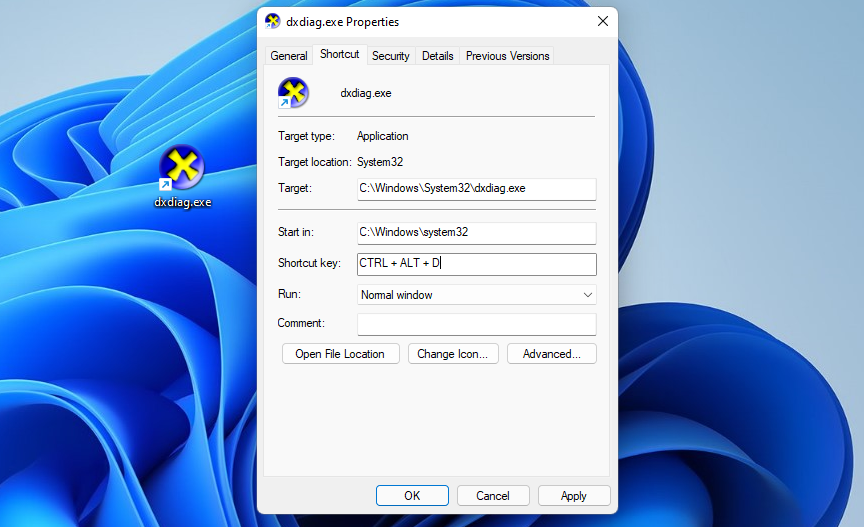
- Select Apply to save your new hotkey.
- Click the properties window'south OK button.
- Press the Ctrl + Alt + D key combination to bring up DirectX Diagnostic Tool.
The desktop context menu is an alternative place to stick a DxDiag shortcut, only yous'll demand to edit the registry to do it. When you lot've done and then, yous tin can open DxDiag from the right-click carte. Y'all can set upwardly a DirectX Diagnostic Tool context menu shortcut by calculation a new registry primal for it like this.
- Open the search tool, and type the keyword regedit in that location.
- Click Registry Editor in the search utility to launch that app.
- Input Reckoner\HKEY_CLASSES_ROOT\Directory\Background\shell in the Registry Editor's accost bar.
- Click the crush key with the right mouse button to select New > Central.
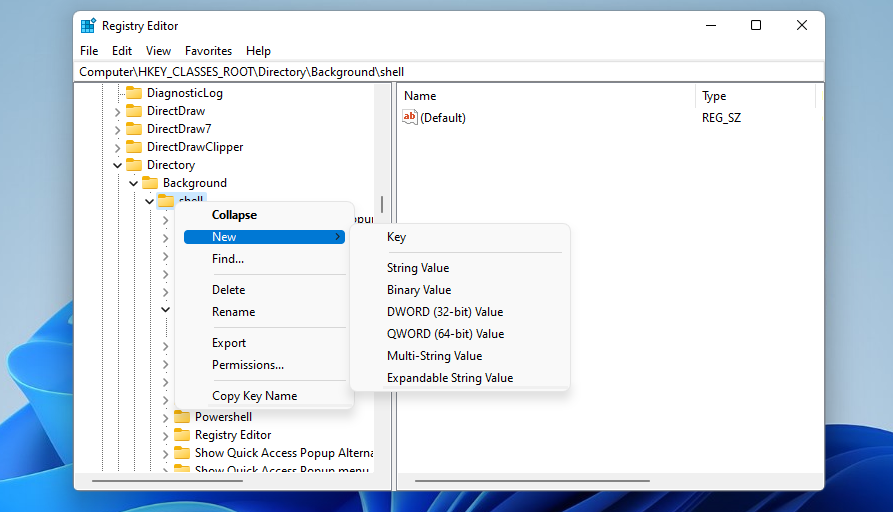
- For the new primal'due south title, enter DirectX Diagnostic Tool in the text box.
- Correct-click DirectX Diagnostic Tool in the Registry Editor to select New and Primal.
- Type command for the subkey's name.
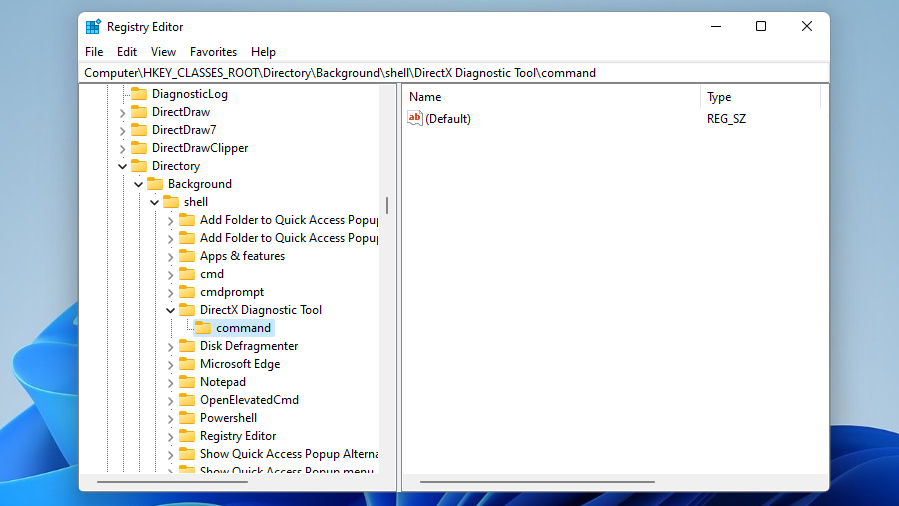
- Select the new control key, and double-click its (Default) string.
- Input "C:\Windows\System32\dxdiag.exe" within the Value information box as in the snapshot direct below.
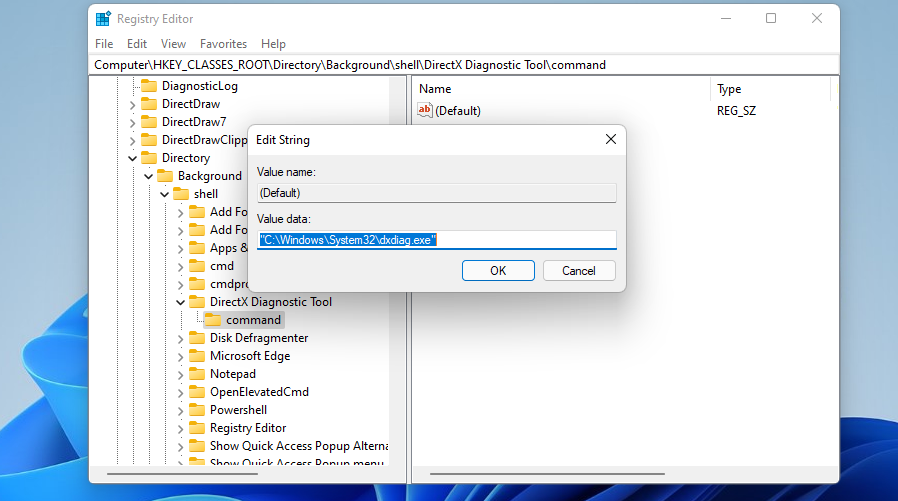
- Click OK to apply, and close the Registry Editor.
At present go and open up DirectX Diagnostic Tool from the context bill of fare. Right-click somewhere on your desktop to select Prove more than options. Click the new DirectX Diagnostic Tool shortcut you simply added there to open up DxDiag's window.
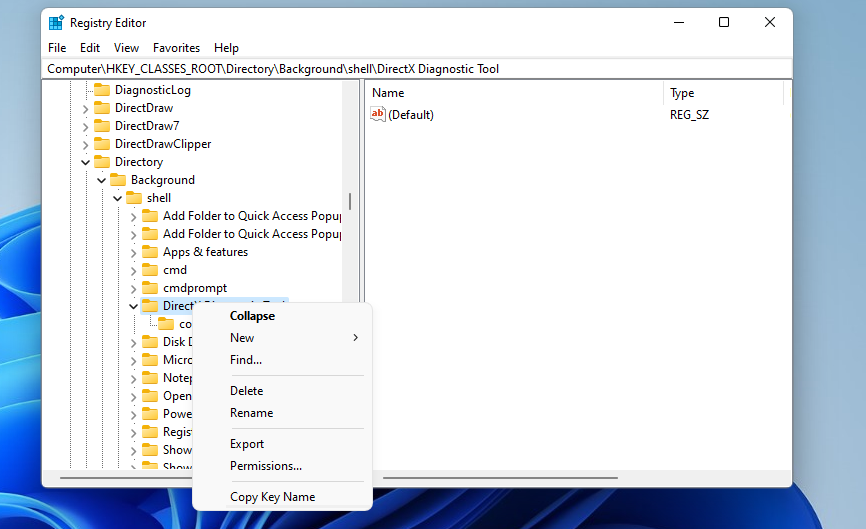
Y'all tin can always remove the DxDiag context card shortcut by erasing its registry key. Right-click the DirectX Diagnostic Tool key in the Registry Editor to select a Delete option. Then click Yeah to delete both that central and its subkey.
DirectX Diagnostic Tool volition always come in handy whenever y'all need to check if your PC's specs lucifer up to minimum organization requirements for games. It can besides be useful for troubleshooting gaming and video playback issues.
You can open DxDiag in Windows xi with any of the above methods, only some are slightly quicker than others. Opening DirectX Diagnostic Tool with Run, the Windows search tool, Task Manager, or Windows Terminal might be fine for many users. For the quickest access, however, information technology's improve to ready up DxDiag shortcuts every bit outlined in methods five to eight.
About The Author

Source: https://www.makeuseof.com/windows-11-open-directx-diagnostic-tool/
Posted by: mccreightearom1994.blogspot.com
0 Response to "How To Run Dxdiag On Windows 8"
Post a Comment